

The Ultimate Aardwolf Autolock Repair Guide | Fix Your Slab Lifter Fast
|
Summary: Maintaining your Aardwolf Slab Lifter is simple with the right tools and replacement parts. This guide explains how to replace the autolock mechanism, improve lifting performance, reduce downtime, and extend equipment life. Regular maintenance helps ensure safer slab handling and reliable operation in every fabrication shop. |
A reliable Aardwolf Slab Lifter is one of the most valuable material handling tools in a stone fabrication shop. Whether you're moving granite, marble, quartz, porcelain, or engineered stone, the lifter helps move heavy slabs safely while reducing manual effort and protecting valuable materials.
Like any piece of equipment that sees daily use, however, certain wear components require periodic maintenance. One of those components is the autolock mechanism. Fortunately, replacing it isn't a complicated repair. With a few basic tools and the correct replacement parts, you can restore your Aardwolf lifter to proper working condition in just a few minutes.
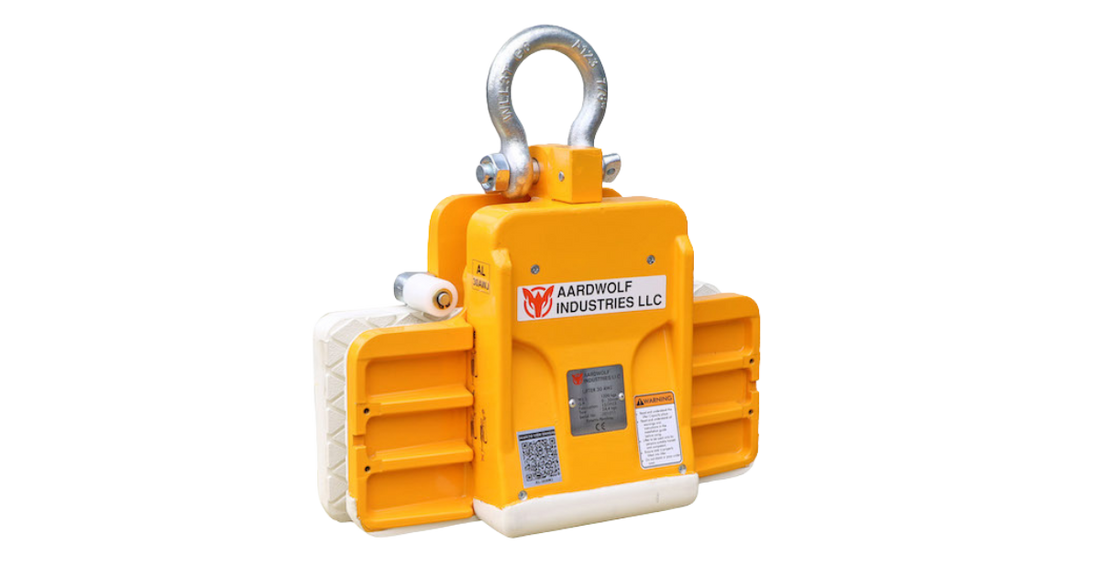
Routine maintenance doesn't just keep your Slab Lifter operating smoothly—it also helps improve workplace safety, reduces downtime, and extends the service life of your equipment.
This guide walks through the complete autolock replacement process while explaining why each step matters.
Video Reference: This guide is based on the official Aardwolf autolock replacement demonstration. Watch the original video here:
Why the Autolock Mechanism Matters
The autolock mechanism is one of the most important safety features on an Aardwolf Slab Lifter.
When positioned correctly, it automatically locks the lifter onto the slab during lifting. This allows operators to move heavy stone safely without manually engaging the clamp every time.
A properly functioning autolock helps:
-
Secure the slab during lifting
-
Reduce manual handling
-
Improve operator confidence
-
Speed up loading and unloading
-
Support safer material handling workflows
Because the mechanism moves every time the lifter is used, it naturally experiences wear over time.Fortunately, Aardwolf designs these parts to be replaceable, making maintenance straightforward rather than requiring replacement of the entire lifter.
Signs Your Aardwolf Slab Lifter Needs an Autolock Replacement
Regular inspections can help identify wear before it affects productivity.
Watch for these common signs:
-
Autolock no longer engages consistently
-
Locking mechanism sticks during operation
-
Spring tension feels weak
-
Locking pin shows excessive wear
-
Locking action feels rough instead of smooth
-
Visible damage around the locking assembly
If you notice any of these issues, replacing the autolock assembly is often the quickest solution.
Replacement Parts Are Already Included
One convenient feature of the Aardwolf lifter is that every new unit includes a spare autolock mechanism in the supplied kit.
For shops performing routine preventive maintenance, Aardwolf also offers a complete maintenance kit that includes replacement wear components such as:
-
Springs
-
Rubber stops
-
Locking components
-
Additional maintenance parts
Keeping these items on hand minimizes downtime whenever routine servicing becomes necessary.
Tools You'll Need Before Starting
One reason this repair is so approachable is that it requires only a few common tools.
Before beginning, gather:
|
Tool |
Purpose |
|
4 mm hex key |
Remove and install hex screws |
|
Pliers |
Secure the plastic cap |
|
Thin wooden block or wedge |
Hold the spring during installation |
|
Dry silicone lubricant |
Lubricate the new locking pin |
Having everything ready before disassembly helps the repair move smoothly from start to finish.
Step 1: Place the Lifter in the Locked Position
Before removing any components, verify that the Slab Lifter is in its locked position.
This is an important first step because the locking assembly must remain properly positioned during replacement.
Take a moment to confirm the difference between:
-
Locked position
-
Unlocked position
Starting with proper orientation makes the remaining steps much easier.
Step 2: Remove the Hex Screws
Using a 4 mm hex key, remove the two hex screws securing the existing autolock mechanism. Work carefully to avoid stripping the screw heads as you loosen them.
Once the screws have been removed, set the old hardware aside. The replacement autolock kit includes new hex screws, which will be installed later in the repair process along with the new locking pin.
This ensures every critical fastening component is replaced as part of the autolock installation, helping maintain reliable operation and proper alignment.
Step 3: Remove the Existing Locking Pin
With the two hex screws removed, detach the existing locking pin from the lifter. Once removed, set it aside before preparing the replacement locking pin included in the autolock kit.
Step 4: Lubricate the New Locking Pin
Before installing the replacement locking pin, apply a small amount of dry silicone lubricant. Only a light coating is needed. Focus on the grooves along the locking pin.
This lubrication helps:
-
Promote smoother movement
-
Reduce friction
-
Support consistent locking action
-
Minimize premature wear
Avoid using heavy grease or oils that may attract dust and stone debris commonly found in fabrication environments.
Dry silicone provides clean lubrication without collecting contaminants.
Step 5: Install the New Spring
This step requires a little patience. Using a thin wooden block or wedge, carefully lift the spring into position.
Using a thin wooden block or wedge, carefully lift the new spring into position. The wooden piece helps hold the spring while creating enough clearance to install the new locking pin. Once the spring is held in place, you're ready to insert the replacement locking pin.
Although the process may look challenging the first time, it becomes much more comfortable after completing it once.
Step 6: Install and Align the New Locking Pin
With the spring held in position, insert the new locking pin into the housing. Before securing it, look through each screw hole and slowly rotate the locking pin until the groove aligns with the opening. Proper alignment allows the screws to pass through and lock the pin securely in place.
Once the groove is correctly aligned, install the two new hex screws, one on each side of the locking assembly and tighten them.
A few extra seconds spent confirming alignment can prevent additional repairs later.
Step 7: Secure the Plastic Cap
The final step is securing the white plastic cap. Using a pair of pliers, carefully press the cap into place. The demonstration also shows an easier method.
Instead of forcing the cap directly, first align the locking pin with the housing hole.
Once everything lines up properly, the cap can be installed much more easily. This small adjustment simplifies the final step while helping ensure proper assembly.
Test the Mechanism Before Returning to Service
After reassembly, don't immediately begin lifting slabs. Instead, test the mechanism several times without a load.
Verify that the autolock:
-
Engages properly
-
Releases smoothly
-
Moves freely
-
Returns consistently after operation
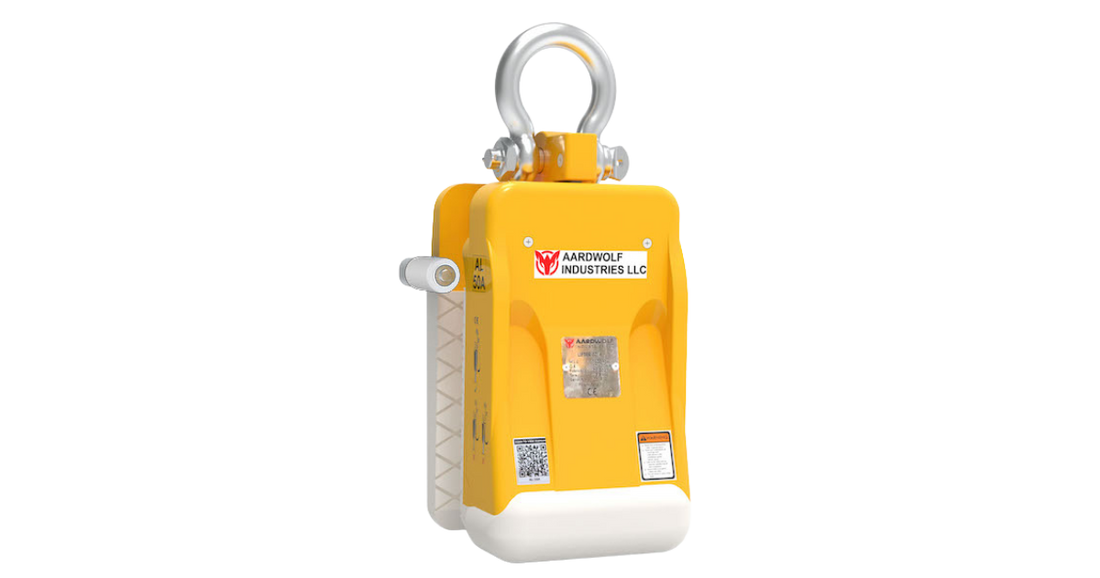
Only after confirming proper function should the Aardwolf Slab Lifter return to normal service.
This quick inspection provides confidence that the repair was completed correctly.
Preventive Maintenance Keeps Your Slab Lifter Working Longer
Replacing the autolock is only one part of maintaining your equipment.
A simple inspection routine helps identify small issues before they become expensive repairs.
Consider checking your Slab Lifter regularly for:
-
Loose fasteners
-
Rubber pad condition
-
Spring wear
-
Dirt buildup
-
Excessive movement
-
Visible cracks or damage
Routine cleaning also plays an important role.
Stone dust, slurry, and debris can accumulate around moving components over time.
Keeping the locking assembly clean helps preserve smooth operation while reducing unnecessary wear.
Small maintenance tasks performed consistently often prevent larger repairs later.
Why Genuine Replacement Parts Matter
While replacement components may appear similar, genuine Aardwolf parts are manufactured specifically for the original equipment.
Using factory components helps maintain:
-
Proper fit
-
Reliable locking performance
-
Safe operation
-
Long-term durability
Because the autolock is a critical safety component, installing the correct replacement parts is always recommended.
Using the proper maintenance kit also simplifies future servicing by ensuring compatible components are readily available whenever needed.
Support from Tait Sales & Consulting
Maintaining an Aardwolf lifter doesn't have to be complicated.
At Tait Sales & Consulting, you'll find replacement parts, maintenance kits, and knowledgeable support to help keep your lifting equipment operating safely.
Whether you're replacing an autolock, ordering wear components, or selecting a new Aardwolf Slab Lifter, experienced guidance helps ensure your equipment matches the demands of your fabrication shop.
Routine maintenance not only protects your investment but also helps reduce downtime and improve day-to-day productivity.
Conclusion: A Simple Repair That Protects Productivity
The autolock mechanism is a small component, but it plays a major role in the safe operation of every Aardwolf Slab Lifter. Fortunately, replacing it is a straightforward process that requires only a few basic tools and a replacement kit.
By following the proper installation steps, lubricating the new locking pin, carefully aligning the components, and testing the mechanism before returning it to service, fabrication shops can restore reliable performance in just a short amount of time.
Regular maintenance is one of the easiest ways to extend the life of your Aardwolf lifter, reduce unexpected downtime, and keep slab handling safe and efficient. Investing a few minutes in preventive care today helps ensure your Slab Lifter continues performing reliably through countless lifts in the future.
Keep your Aardwolf Slab Lifter performing at its best with genuine replacement parts and expert support from Tait Sales & Consulting, LLC.
FAQ's
Inspect your slab lifter before daily use and perform routine maintenance regularly to identify worn or damaged components.
You'll need a 4 mm hex key, pliers, a thin wooden wedge, and dry silicone lubricant.
Yes. New Aardwolf slab lifters typically include one replacement autolock mechanism in the supplied kit.
Dry silicone helps the locking pin move smoothly without attracting dust, slurry, or other debris common in fabrication shops.
Tait Sales & Consulting offers genuine Aardwolf replacement parts, maintenance kits, and expert support for your slab lifting equipment.
Robert Tait
Robert Tait is a senior sales and operations leader with over 30 years of experience in manufacturing and distribution. Based in Overland Park, Kansas, he is the President of Tait Sales & Consulting LLC (TSC), a family-owned and operated venture he founded in 2019. TSC was founded to provide diamond tooling, material handling, and all related consumables to the natural stone industry. The industries have now expanded to include, construction, glass, tile, masonry, hardscape and concrete industries.